Replacement Bezel Installation Instructions for DIGITAL AlphaStation™ 500/255 Series System Enclosures
Order Number: EK-ALSRE-IN
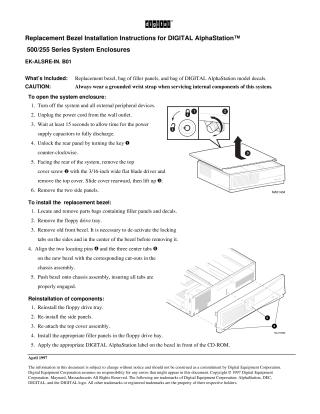
This document provides step-by-step instructions for replacing the front bezel on DIGITAL AlphaStation 500/255 Series System Enclosures. It emphasizes safety precautions, such as powering off the system, unplugging it, waiting for power supply capacitors to discharge, and wearing a grounded wrist strap before servicing.
The process is divided into three main stages:
- Opening the system enclosure: Involves turning off the system, unplugging it, waiting 15 seconds, unlocking the rear panel, removing the top cover, and then removing the two side panels.
- Installing the replacement bezel: Requires locating filler panels and decals, removing the floppy drive tray, carefully removing the old front bezel by de-activating its locking tabs, aligning the new bezel's pins and tabs with the chassis, and pushing it into place.
- Reinstallation of components: Details reattaching the floppy drive tray, side panels, and top cover, installing appropriate filler panels in the floppy drive bay, and applying the DIGITAL AlphaStation label to the bezel.
Site structure and layout ©2025 Majenko Technologies