AlphaServer DS10 Rackmount Guide
Order Number: EK-DS10S-RM
This document, the "ALPHASERVER DS10 RACKMOUNT GUIDE," provides step-by-step instructions for installing an AlphaServer DS10 system into a rackmount cabinet.
Key steps and information covered include:
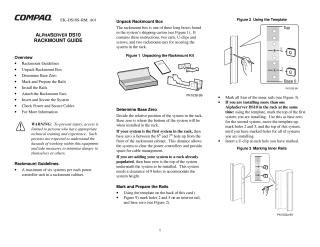
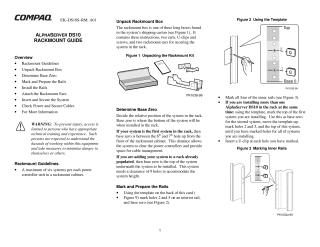
- Unpacking the Rackmount Box: Details the contents, including rails, U-clips, screws, and rackmount ears.
- Rackmount Guidelines: Specifies a maximum of six systems per power controller unit in a rackmount cabinet. Includes a warning that access and installation are limited to technically trained personnel.
- Determining Base Zero: Explains how to establish the system's position in the rack. For the first system, "base zero" is between the 6th and 7th hole from the floor. For adding to an existing setup, base zero is the top of the system underneath, requiring 9 holes clearance for the new system.
- Marking and Preparing the Rails: Instructs users to use a template to mark specific holes (2, 5, and base zero) on the inner rails and insert U-clips.
- Installing the Rails: Guides on inserting guide pins and securing the rails into the rackmount cabinet using screws.
- Attaching the Rackmount Ears: Details how to align and screw the rackmount ears onto the front of the system.
- Inserting and Securing the System: Describes placing the system onto the installed rails, pushing it into the cabinet, aligning it, and securing it by tightening captive screws on the rackmount ears.
- Checking Power and Secure Cables: Covers selecting the correct power setting, connecting and securing the power cord with a latch, and routing cables properly.
- For More Information: Lists references to other related Compaq cabinet and configuration documents for further details.
Site structure and layout ©2025 Majenko Technologies